Setting Priority Goals
Some schools plan around a small number of priorities for each student rather than a long list of goals. A priority goals plan gives each student three priorities. Each priority is a chain, filled in from top to bottom:
- Priority area: the area of need, such as Learning: Reading.
- Long-term goal: what the student is working towards over the longer term. It fills in from the priority area.
- Short-term goal: a specific goal for this plan. Choose a suggested wording or write your own.
- Measure: how progress will be checked at review.
- Strategies and adjustments: what staff will do to support the goal.
- Goal owner and Review date: who follows the goal up, and when.
- Review outcome: recorded later, when the goal is reviewed.
The school writes the long-term goal and the suggested strategies once for each priority area, in the goal library. Staff then set each priority in a few choices, and can still change any of it for the student.
Already signed in to the sandbox? Open the walkthrough directly: Set three priority goals. The sandbox uses made-up school data and resets every night.
Before you start
Priority goals use three pieces, set up in this order:
- Priority areas in the goal library, each with a long-term goal, goal wordings, measures and suggested strategies.
- A plan template with a goals block set to three priorities.
- The student's plan, added from that template.
You need access to the goal library and to plan templates to set up the first two. Staff who write plans only need the third.
Step 1: Set up priority areas in the goal library
Each priority area is a goal type in the goal library.
- Open Library > Goals (
/dashboard/strategies/library/goals). - Find the goal type and select View. This opens the type's settings page (
/dashboard/strategies/library/goals/edit?type=<type>). - Under Long-term goal, write what every goal in this area works towards. Leave it blank if the area has no long-term goal.
- Under Goals, add the short-term goal wordings staff can choose from. Use prompts in square brackets, such as [date] or [how often], for the parts staff complete for each student. Give each wording a Linked measure.
- Under Measures and questions, check the measures and the questions staff answer at review.
- Under Suggested strategies and adjustments, select Add strategy for each strategy. Use Move up and Move down to set the order staff see them in.
- Under Review outcomes, check the scale used when the goal is reviewed.
- Select Save goals. Goal wordings save to the library as you add them. The other changes save with Save goals.
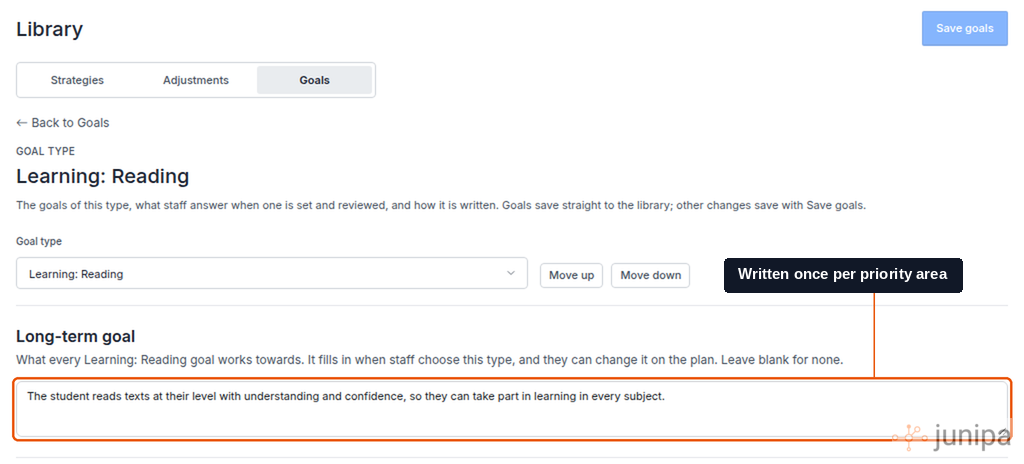
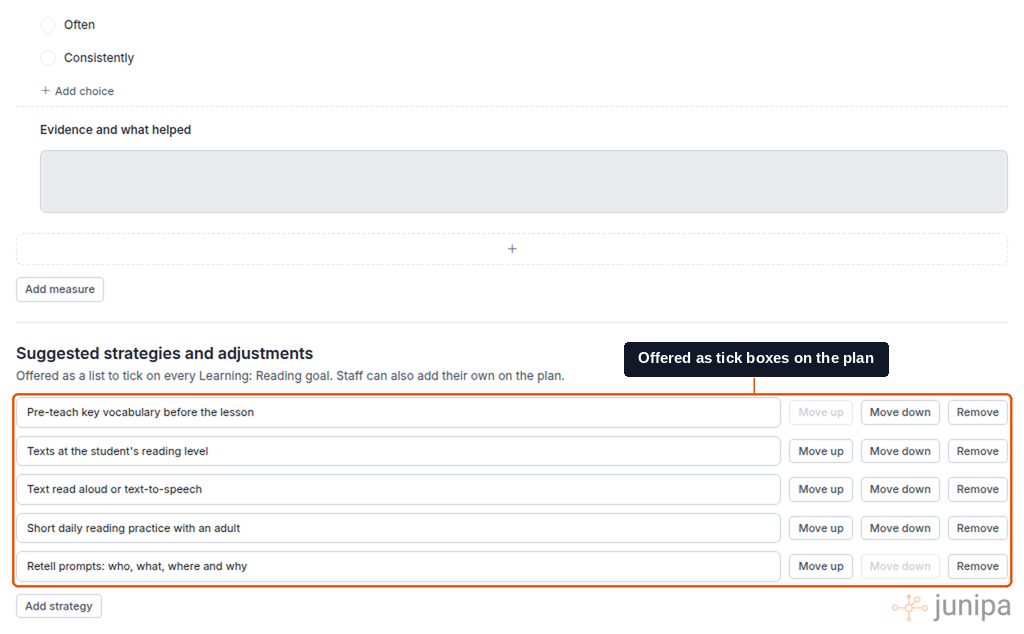
Name priority areas by domain
Name each goal type as Domain: Subcategory, for example:
| Domain | Priority areas |
|---|---|
| Learning | Learning: Reading, Learning: Number |
| Communication | Communication: Asking for help, Communication: Following instructions |
| Wellbeing | Wellbeing: Managing frustration |
| Attendance | Attendance: Coming to school regularly |
| Independence | Independence: Organising materials, Independence: Starting tasks on my own |
On the plan, Junipa groups areas that share a domain under one heading, so staff see Learning with Reading and Number beneath it. A domain with only one area is listed by its full name.
What changes when you edit the library
The long-term goal and the ticked strategies are copied onto the student's plan when staff choose the priority area. Editing the library later changes what new plans start with. It does not change plans already written.
Step 2: Set up the plan template
- Open Plans > Templates (
/dashboard/plans/templates). - Find the template, select the More actions menu, then Edit template. To start a new template instead, see Creating a plan template.
- Find the goals block and select Block options to open Goals settings.
- In Goal heading, type Priority. Each goal is then numbered Priority 1, Priority 2 and Priority 3, and the goal type select reads Priority area.
- Under Number of goals, set Minimum and Maximum to 3. Every plan from this template then shows three priorities.
- Leave Default goal type as Select any goal types so staff can choose any priority area.
- Select Close settings, then Publish.
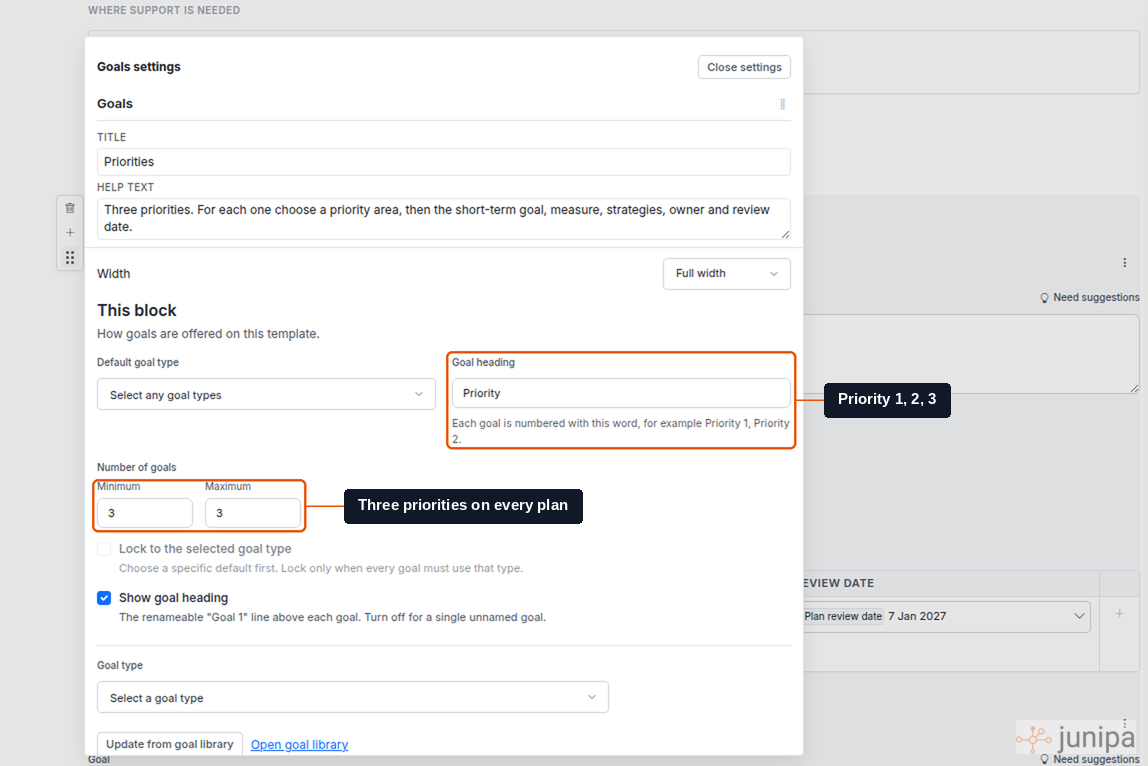
When the priority areas have long-term goals, the Priority area select comes first in each goal. Once an area with a long-term goal is chosen, the goal box below it is labelled Short-term goal, so the plan reads as the chain in order.
Step 3: Add the plan to a student
- Open Plans and select Create new plan (+), or open the student's profile and select Add New Plan.
- Find and select the student.
- Select the priority goals template, then select Start Planning.
See Creating a plan for a student for more on finding students and choosing a template.
Step 4: Set each priority
The plan opens with Priority 1, Priority 2 and Priority 3 ready. For each one:
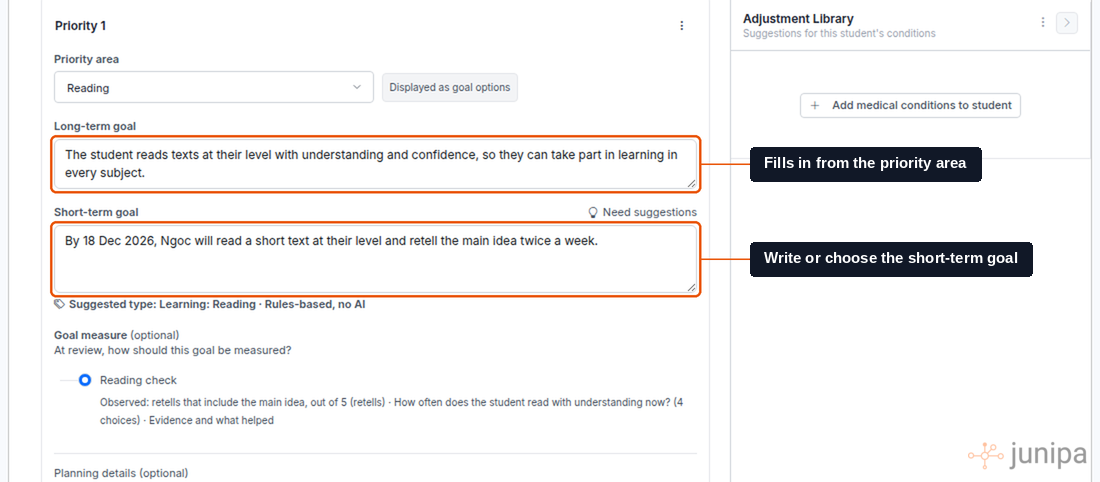
- Choose the Priority area. Areas are grouped by domain.
- Check the Long-term goal. It fills in from the priority area. Change the wording if it needs to fit this student.
- Write the Short-term goal, or select Need suggestions to see the wordings from your school's goal library, starting with this priority area.
- If you chose a suggestion, complete the prompts in Fill in the goal, such as the date and how often, then select Fill in goal. Anything left blank stays as a prompt you can click and type over.
- Check the Goal measure. A suggested wording arrives with its linked measure already chosen. You can choose a different one.
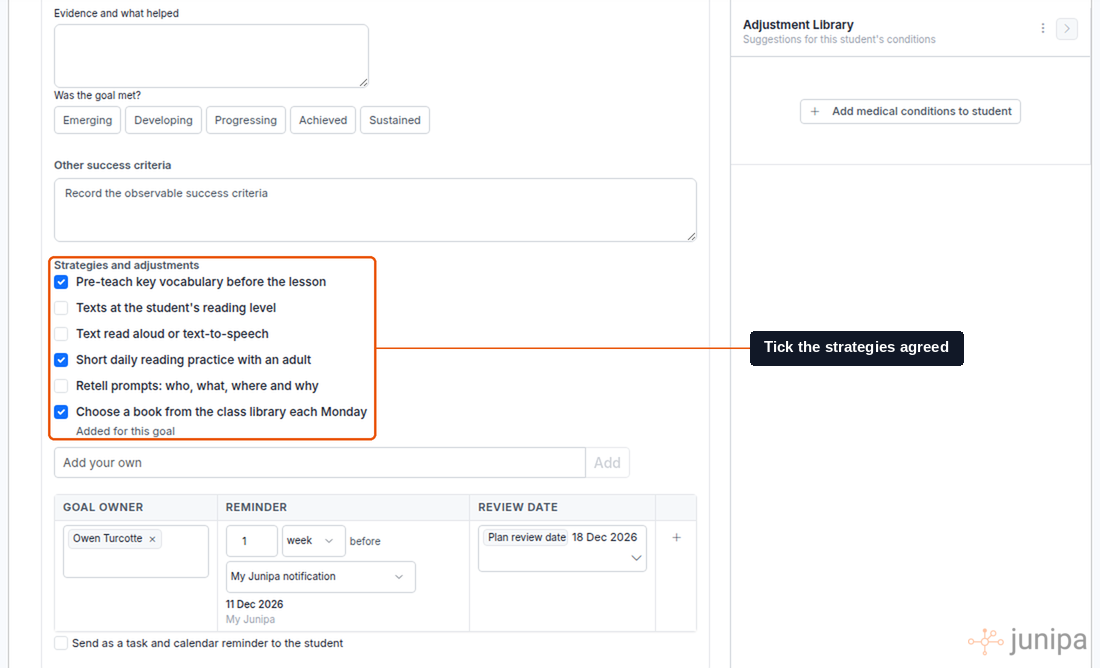
- Under Strategies and adjustments, tick the strategies agreed for this student. Type any others in Add your own and select Add.
- Check the Goal owner. It starts with the plan owner, and you can add other staff.
- Choose the Review date: the plan review date, or a date of its own.
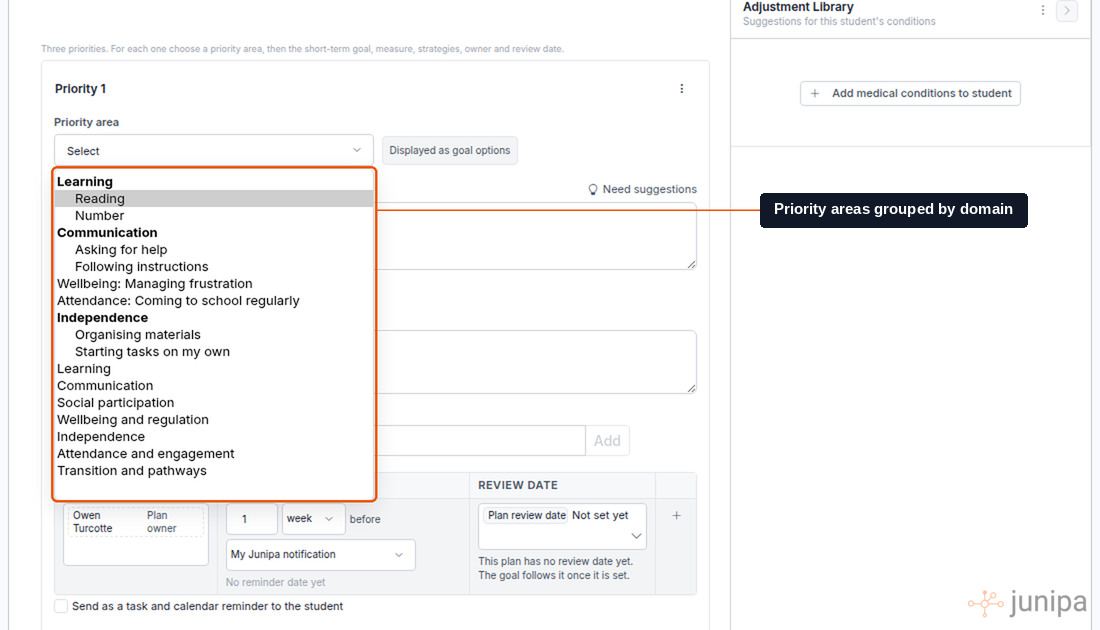
If you change the priority area later, the long-term goal is replaced only when it is blank or still holds the previous area's wording. Ticked strategies stay on the goal.
When all three priorities are set, select Save to keep the plan as a draft, or Publish when the plan is ready.
Read the saved plan
The saved plan shows each priority in order: long-term goal, short-term goal, goal type, measure, strategies and adjustments, then a table with the goal owner, reminder and review date.
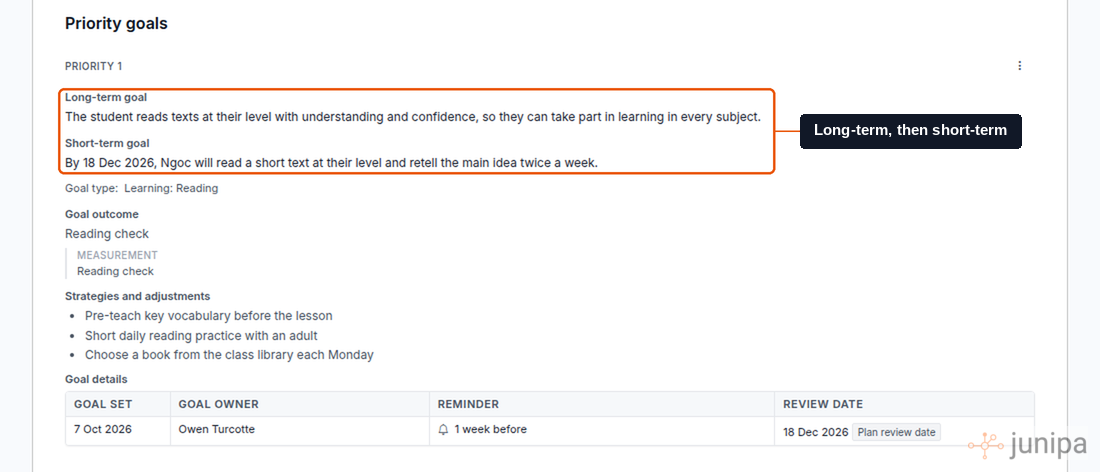
Select Edit to open the plan again when the team is ready to finish it.
Review each priority
When the review date arrives, the goal owner answers the measure's questions and chooses a review outcome from the scale set for the priority area, for example Emerging, Developing, Progressing, Achieved or Sustained. See Record a goal review for the steps.